RAW converter comparison – Capture NX2 vs. Lightroom 2
I was asked to post side-by-side comparisons between Nikon’s Capture NX2 and Adobe’s Lightroom 2. I’ve incorporated both of them into my workflow but the NX2 gets much less use despite much finer controls, more accurate and cleaner colours and detail rendition.
But why?
For starters the NX2 is far from user-friendly and frankly unusable with slow computers. Oh and it falls over more often than a clown car rolling down a hill. Lightroom excels with quick and dirty editing with fast turnaraound from import to publish and keeping large amount of files organized but I feel it lacks the finesse you get from, for instance, Photoshop’s pinpoint curves and saturation adjustments. Lightroom’s sliders and controls have as much accuracy as trying to write your signature by sneezing.
I’m possibly an oddball here but I have no Photoshop, Gimp or other pixel based image editing software installed at home where I do my photography related work. Mind you, graphic design still eats 9 hours of my work day so after a day of sitting in front of Creative Suite and cursing Adobe, Photoshop’s not welcome for dinner after crapping on my desk, no sir.
However the NX2 sits in where Photoshop would be. No, not in the trashcan.
If I want to check out what NX2 could do with a photo, here’s a simple workflow example.
From Lighroom ‘Show in Explorer’, open the file in NX2, do your edits and save the NEF. Export your lovely NX2 NEF to a ‘TIFF’ folder inside the shoot’s parent folder and have Lightroom auto-import new TIFFs to the catalogue. Now you have a fast workflow loop around Lightroom where the NX2 edited files that you auto-imported to Lightroom can be quick collected, flagged, rated, metatags synced, watermarked (NX2 has no usable watermarking feature) and exported together with Lightroom versions.
And since NX2 embeds its edit data nondestructively inside the file, Lightroom keeps on churning happily completely oblivious that the files might have NX2 versions too as Lightroom keeps all the edit data in its catalogue file.
By the way, this is where the notorious ‘The Lightroom preview looks fine but then it messes up the colours’ comes from.
Loading a RAW into LR (or Bridge/Photoshop as they all use the same ACR converter) first loads the camera-embedded preview image (on which camera histograms are based, some manufacturer displays histograms on RAW data for more accuracy but can’t remember which one). Then ACR discards the preview and runs the RAW data through it’s converter basically guessing what the numbers should look like. All third-party converters use the same method of discarding the embedded preview and interpreting the RAW data for better or worse. Some converters might do a better job on different colours and scenes than others and some might have more details and less noise or different kind of noise.
Onto samples!
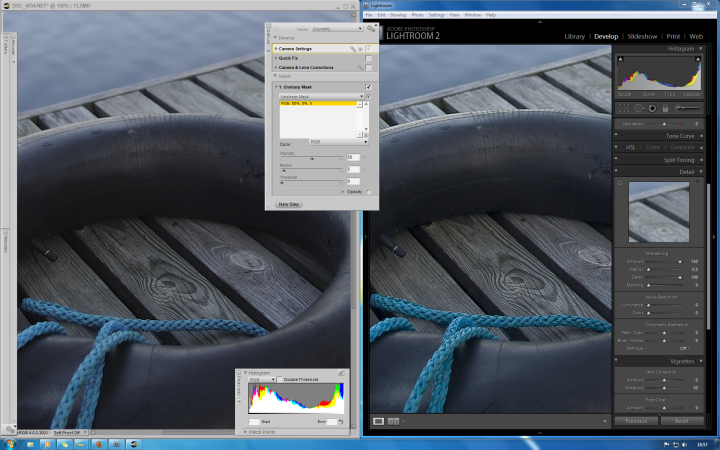
Same file loaded, default settings in Lightroom and Standard picture control in NX2. Sharpness increased to compare detail and artifacts. Notice the Lightroom has a lighter exposure and struggles with blue and cyan hues of the rope. ACR usually tints shadows and has problems keeping them neutral. Custom profiles help but at least on D700 do not remove the tinted shadows. D700 / Nikkor 20-35/f2.8 @ 2.8 / ISO 200 / 14-bit NEF uncompressed
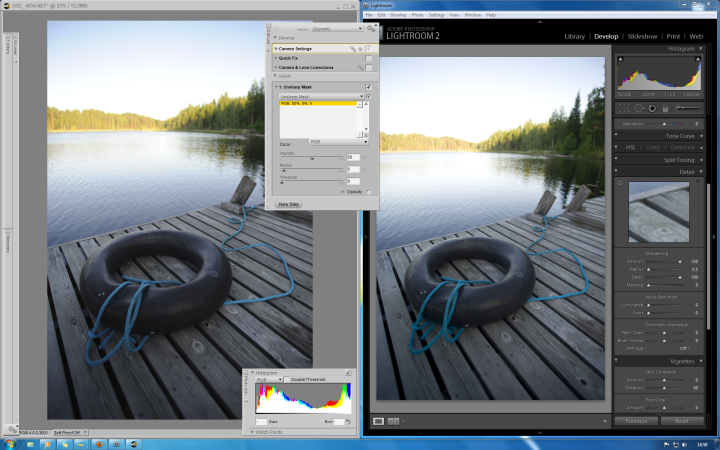
Same file again, default settings. Notice the sky, lake, forest and lake hues are quite different. ACR can't read the recorded white balance readings accurately from NEF files. Highlights were both savable if you were worried about them. D700 / Nikkor 20-35/f2.8 @ 2.8 / ISO 200 / 14-bit NEF uncompressed
Another shoot and now we begin to see some big differences.
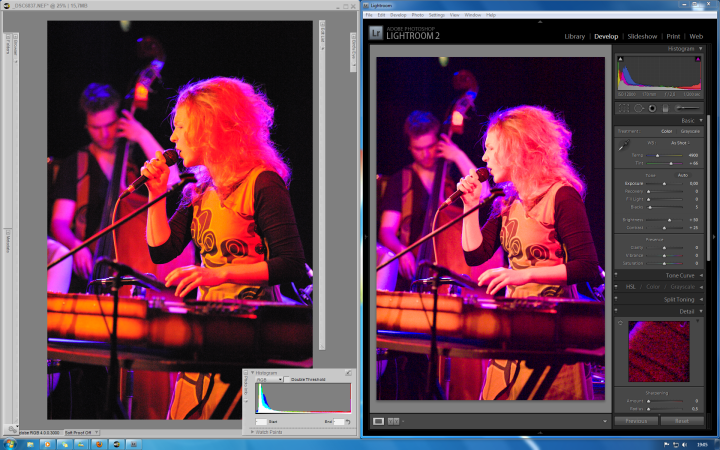
ISO 12k, very hard LED-stage lights and ACR goes nuclear on default settings. Picture control on Vivid, white balance auto A6. Very different colours, shadows, noise levels and highlights. D700 / Nikkor 80-200/f2.8 @ 2.8 / ISO 12,800
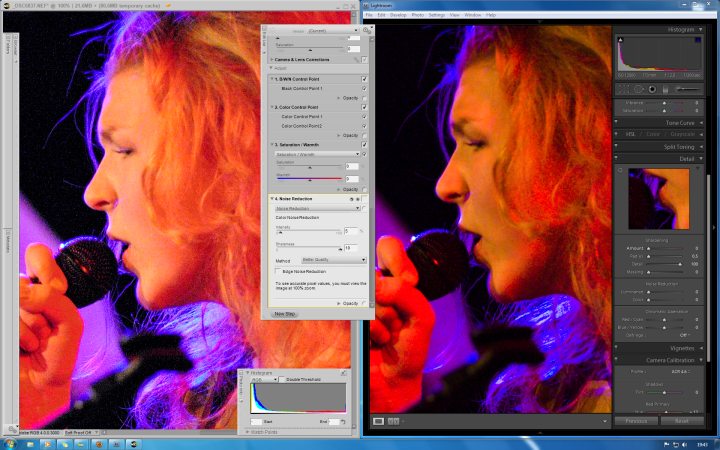
Some adjustments later the NX2 has a much natural skin tone and less muddy colours. Also notice the differences in highlights in the backlit hairs under the chin.
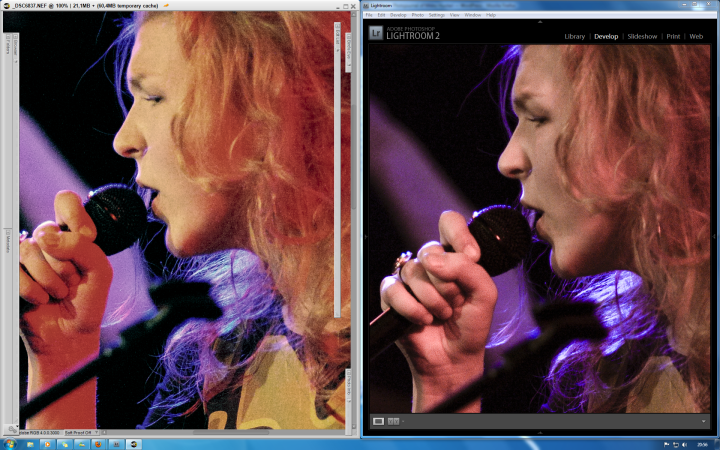
Here you begin to see some quirks concerning different converters. Exposing to the right and pulling down the exposure and dropping saturation keeps the ACR noise levels down without any additional noise removal. Nikon's engineering approach to chroma and luminosity noise does help quite a lot at these cases. Couldn't get rid of the NX2's strange grainy noise. Detail is also better in NX2. Remember these are 1:1 crops and on print the noise smoothens even more. Skin tones might need more work but this post has dragged on for too bloody long already.
Some end results.

Utu @ Vastavirta, Tampere Finland Jan 13th 2010. D700 / Nikkor 80-200mm/f2.8 @ wide open, ISO 12,800

Utu @ Vastavirta, Tampere Finland Jan 13th 2010. D700 / Nikkor 80-200mm/f2.8 @ wide open, ISO 12,800

Klaara @ Vastavirta, Tampere Finland Jan 13th 2010. D700 / Nikkor 80-200mm/f2.8 @ wide open, ISO 12,800
leave a comment